Stinkoman 20X6 Walkthrough Level 7
From Homestar Runner Wiki
The Cheatbot (Talk | contribs) (autoreplace: — → {{--}}) |
|||
| (includes 33 intermediate revisions) | |||
| Line 4: | Line 4: | ||
===Stage 7.1 (Transcript)=== | ===Stage 7.1 (Transcript)=== | ||
| - | + | [[Image:Stinkoman 20X6 Red Button Lightning.png|thumb]] | |
''{Cut to Stinkoman walking in the Pink Cloud Zone.}'' | ''{Cut to Stinkoman walking in the Pink Cloud Zone.}'' | ||
| Line 13: | Line 13: | ||
'''SHADOWY FIGURE:''' ''{subtitled}'' MMMM HMMM HMMM... | '''SHADOWY FIGURE:''' ''{subtitled}'' MMMM HMMM HMMM... | ||
| - | ''{Close up of the shadowy figure's finger pushing a red button.}'' | + | ''{Close-up of the shadowy figure's finger pushing a red button.}'' |
| - | '' | + | |
| + | '''TEXT:''' PUSH! | ||
''{Cut back to Stinkoman, who gets hit by a bolt of blue lightning.}'' | ''{Cut back to Stinkoman, who gets hit by a bolt of blue lightning.}'' | ||
| Line 20: | Line 21: | ||
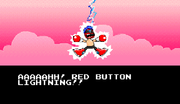
'''STINKOMAN:''' ''{subtitled}'' AAAAAHH! RED BUTTON LIGHTNING!! | '''STINKOMAN:''' ''{subtitled}'' AAAAAHH! RED BUTTON LIGHTNING!! | ||
| - | ''{Stinkoman disappears and is transported to | + | ''{Stinkoman disappears and is transported to an icy place. Close-up on Stinkoman.}'' |
| - | + | ||
| - | + | ||
'''STINKOMAN:''' ''{subtitled}'' WHERE IN CHORCH'S NAME AM I?!? | '''STINKOMAN:''' ''{subtitled}'' WHERE IN CHORCH'S NAME AM I?!? | ||
| Line 30: | Line 29: | ||
'''STINKOMAN:''' ''{subtitled}'' BRRRR! IT'S COLD! I BETTER KEEP MOVING OR I ELSE I'LL FREEZE TO SQUARE! | '''STINKOMAN:''' ''{subtitled}'' BRRRR! IT'S COLD! I BETTER KEEP MOVING OR I ELSE I'LL FREEZE TO SQUARE! | ||
| - | ''{Stinkoman runs off to the right.}'' | + | ''{Cut to a zoomed out shot. Stinkoman runs off to the right as he is slowly silhouetted.}'' |
'''STINKOMAN:''' ''{subtitled}'' MAN, WHEN I FIND WHOEVER RED BUTTONED ME, I'M GONNA CHALLENGE THE CRAP OUT OF THEM. | '''STINKOMAN:''' ''{subtitled}'' MAN, WHEN I FIND WHOEVER RED BUTTONED ME, I'M GONNA CHALLENGE THE CRAP OUT OF THEM. | ||
| + | |||
| + | ''{Cut to the level start scene with the words "TRY LEVEL 7.1" at the bottom.}'' | ||
| + | |||
| + | ''{As the level begins, the following words are projected across the screen for a few seconds.}'' | ||
START PLAY! | START PLAY! | ||
| Line 38: | Line 41: | ||
===Stage 7.1 (Guide)=== | ===Stage 7.1 (Guide)=== | ||
[[Image:Stinko20X6 Lvl7.png|thumb|Don't freeze to square!]] | [[Image:Stinko20X6 Lvl7.png|thumb|Don't freeze to square!]] | ||
| + | [[Image:Stinkoman 20X6 Freeze 2 Square.png|thumb|What did we JUST say?]] | ||
* First order of business: DON'T STAND STILL IN THIS LEVEL! If you do, Stinkoman will eventually freeze into an ice cube, costing him a unit of life. Additionally, the entire level has poor traction, making it difficult to both start and stop moving. | * First order of business: DON'T STAND STILL IN THIS LEVEL! If you do, Stinkoman will eventually freeze into an ice cube, costing him a unit of life. Additionally, the entire level has poor traction, making it difficult to both start and stop moving. | ||
| - | * Destroy or avoid the three My Benj, and make your way past the Ditmars when it stops. Destroy the Biztar in front of you by | + | * Destroy or avoid the three My Benj, and make your way past the Ditmars when it stops. Destroy the ice cube (or "Biztar") in front of you by blasting it six times. |
| - | * Climb the retractable ladder when it comes down, and then destroy the Biztar | + | * Climb the retractable ladder when it comes down, and then destroy the Biztar. There may be a capsule below, but the upper path is easier in this case. |
| - | * Be prepared for the Fullbide when it flies by; destroy it so it doesn't come back. Head right and destroy the two Biztars and the My Benj behind them. | + | ** If you choose to take the lower path, jump the two Seeper Mo, grab the capsule. Then destroy the Stothos and jump to the next platform and destroy the My Benj. Get past the Ditmars. Don't jump, or you will touch an Old Sage. |
| - | * Keep going forward on the upper path. Another Fullbide will bother you. | + | * Now, back to the upper path. Be prepared for the Fullbide when it flies by; destroy it so it doesn't come back. Head right and destroy the two Biztars and the My Benj behind them. |
| - | * From this platform, jump down to the next, watching out for the Fullbide. | + | * Keep going forward on the upper path. Another Fullbide will bother you. Kill or avoid it, and destroy the next Biztar in your path. It will reveal a Seeper Mo; wait for the platform to arrive (jump in place or keep attacking air to avoid freezing) and jump over the Seeper Mo to land on it. |
| - | * Destroy the Biztar to reveal a | + | * From this platform, jump down to the next, watching out for the Fullbide. Jump to the next platform (and cross the checkpoint flag in New Mode), then then jump past the last Ditmars. |
| - | * Jump to the right, destroying or avoiding the My Benj. Make your way past the | + | * Destroy the Biztar to reveal a capsule (a Fullbide may appear here), and trash the My Benj behind it. Then, destroy the Biztar over the trap door. Jump to it as the trap is coming up; here there are two paths you can take. |
| - | * A Stothos is waiting for you above. Either take it out, or quickly rush through it if you have energy to spare (there's a | + | ** Lower path: Jump to the right, destroying or avoiding the My Benj. Make your way past the Ditmars when they're inactive. At the cliff, jump to the lowest platform. This is where the paths connect. |
| - | * Jump down to the | + | ** Upper path: Climb the ladder and destroy the Stothos. Jump on the platform to the right side of the wall, then jump off, break up the Biztar while dodging the My Benj, and (if you can) blast the little blob to bits. Then jump onto the platform, and you'll be where the paths cross. |
| - | * Climb the two retractable ladders and | + | * Jump onto the right platform, then hop on the moving platform when it's in range. |
| + | * A Stothos is waiting for you above. Either take it out, or quickly rush through it if you have energy to spare (there's a capsule beneath). | ||
| + | ** An easy way to kill the Stothos is by jump-shooting it from the moving platform. | ||
| + | * Jump down to the capsule if you need it while avoiding the Seeper Mo. | ||
| + | * Climb the two retractable ladders and blow up the Stothos. | ||
* Jump down to the moving platform, and then to the flag to end the level. | * Jump down to the moving platform, and then to the flag to end the level. | ||
| Line 58: | Line 66: | ||
===Stage 7.2 (Guide)=== | ===Stage 7.2 (Guide)=== | ||
| - | + | [[Image:Stinkoman 20X6 Shoot Through Walls.png|thumb|Helpful Tip #1: Shooting through walls makes destroying shorties easier.]] | |
| - | + | [[Image:Stinkoman 20X6 Leapin' Through Ditmars.png|thumb]] | |
| - | * Destroy the Biztar and collect | + | [[Image:Stinkoman 20X6 Shoot On Ladders.png|thumb|Helpful Tip #2: You don't freeze on ladders, so have fun with enemies!]] |
| - | * Jump across the platforms, destroy or avoid the My Benj, and destroy the Stothos. | + | * There's a capsule behind the lowest Biztar in the "wall" to your left. |
| - | * On the next platform, watch out for the Fullbide. Avoid the | + | * Destroy the Biztar on the right and collect an extra life. This may come in handy when you get to the boss stage. |
| - | + | * Jump across the platforms, destroy or avoid the My Benj, and destroy the Stothos. (The My Benj is easier to kill from far, so before you jump onto the next platform, just shoot until you think the My Benj are destroyed.) | |
| - | * | + | * On the next platform, watch out for the Fullbide. Avoid the Ditmars and the My Benj as you continue. Jump on the next platform. There are two paths from here, both leading to the moving platform. |
| - | * Jump to the moving platform and grab the | + | ** Lower path: Do '''not''' destroy the two Biztars. Instead, jump on them and keep yourself occupied until the moving platform comes down. |
| + | ** Upper path: Jump up the stair-like platforms to the left and climb the ladder. At the top of the ladder, shoot the Fullbide, then jump onto the next platform to the right. Shoot the My Benj. | ||
| + | * Jump to the moving platform when it reaches you. You can grab the capsule on the left, but watch out for the Seeper Mo! | ||
| + | * Jump on the next platform, and then to the ground. Carefully jump over the Seeper Mos and past the Ditmarses. (Don't bother to stop, because your momentum will likely carry you into the next one anyway if you do, and you'll reach the Ditmarses while inactive if you keep moving.) Don't worry too much if you get hit once or twice because another capsule is coming up. In New Mode, cross the checkpoint flag. | ||
| + | * Jump to the moving platform and grab the capsule. Climb the retractable ladders (you can reach the first one even if it's retracted) while watching out for Fullbides. '''Don't destroy any Biztars!''' | ||
* Climb down the Biztars. While standing on the last, try to destroy the two Biztars to the right to make your life easier. | * Climb down the Biztars. While standing on the last, try to destroy the two Biztars to the right to make your life easier. | ||
| - | * Jump down and | + | * Jump down and a splode the Stothos. Space is limited here, so make sure your jumps count. |
| - | * If you didn't destroy those two Biztars to the right yet, do it now. Jump to the | + | * If you didn't destroy those two Biztars to the right yet, do it now (though the far right one isn't necessary). Jump to the platform the Stothos was on and then to the floating platforms to the right. Climb up the platforms while dodging or destroying the Fullbides that fly from both sides. |
| - | * At the top, destroy the My Benj to the right and jump to their platform. Drop down and climb the ladder down, destroying all Fullbides on the way. | + | * At the top, destroy the My Benj to the right and jump to their platform. Drop down and climb the ladder down, destroying all Fullbides on the way. '''Don't drop down the ladder!''' |
* Climb low enough that you can see the moving platform. When the platform is just about to reach its leftmost position, climb to the top and quickly jump down and to the right, so that you land on the platform. | * Climb low enough that you can see the moving platform. When the platform is just about to reach its leftmost position, climb to the top and quickly jump down and to the right, so that you land on the platform. | ||
* Jump to the ground to the right to end this level. | * Jump to the ground to the right to end this level. | ||
| Line 75: | Line 87: | ||
===Level 7 Boss: An Ice Machine (Transcript)=== | ===Level 7 Boss: An Ice Machine (Transcript)=== | ||
| - | '' | + | ''{As the round begins, An Ice Machine will fall from the sky, causing the ground to shake. Stinkoman will say his world-famous line.}'' |
| - | '' | + | '''STINKOMAN:''' Are you asking for a challenge? |
| + | |||
| + | '''''After you defeat An Ice Machine...''''' | ||
| + | ''{An Ice Machine starts to explode as Stinkoman runs away. The screen flashes white and the boss explodes, blowing Stinkoman away.}'' | ||
| + | [[Image:Level 7 after boss.PNG|thumb|Kablooie!]] | ||
'''STINKOMAN:''' ''{subtitled}'' WHHAAAAAAAAAAA!! | '''STINKOMAN:''' ''{subtitled}'' WHHAAAAAAAAAAA!! | ||
| - | ''{ | + | ''{Stinkoman lands in a victory pose.}'' |
| - | '''STINKOMAN:''' ''{subtitled}'' NOW TO GET REVENGE ON WHOEVER RED BUTTONED | + | '''STINKOMAN:''' ''{subtitled}'' NOW TO GET REVENGE ON WHOEVER RED BUTTONED{{--}} |
''{The blue lightning zaps him again and he's teleported away.}'' | ''{The blue lightning zaps him again and he's teleported away.}'' | ||
| Line 90: | Line 106: | ||
===Level 7 Boss: An Ice Machine (Guide)=== | ===Level 7 Boss: An Ice Machine (Guide)=== | ||
| - | + | [[Image:Level 7 boss.PNG|thumb| An Ice Machine]] | |
| - | + | *An Ice Machine starts the battle by throwing ice cubes at you while shooting a powerful water jet at the platform in front of him. For the time being, jump the ice cubes. | |
| - | + | **He will shoot between two and four, depending on how many times he has been hit. However, his pattern is not straightforward. (Specifically, it is 3, 3, 4, 3, 4, 2, 4.) | |
| - | + | *When he stops shooting cubes, the jet will also stop, so the moment the retractable ladder comes down, climb up immediately and hit his eyes. You can only hit him once, so drop down to more easily avoid the icicles that are about to come your way. | |
| - | * | + | **You can avoid them on the platform, but you'll have to watch them closely and jump down quickly to avoid the jets. |
| - | + | *Repeat the pattern from the beginning. Seven shots will do him in once and for all. | |
| - | [[Category:Stinkoman 20X6]] | + | **However, if you want an advantage: When An Ice Machine drops down, his eyes are open, meaning you can hit him then. Hold S as soon as Stinkoman says his lines, and if you fire at the right time, the boss's eyes will collide with the shot. If you do this, the first 3 in the above pattern is skipped. |
| + | {{Template:Stinkoman 20X6}} | ||
| + | [[Category:Stinkoman 20X6 Walkthrough]] | ||
Current revision as of 03:24, 4 November 2022
Contents |
[edit] Level 7 - ICE 2 MEET U
"Everybody freeze! It's Stinkoman's slipperiest foe yet."
A trap! The mysterious shadowy figure zaps Stinkoman onto an unbearably cold glacier. Oh well, look on the bright side... what platformer is complete without an ice level?
[edit] Stage 7.1 (Transcript)
{Cut to Stinkoman walking in the Pink Cloud Zone.}
STINKOMAN: {subtitled} I SHOULD PROBABLY FIND PAN PAN AND 1-UP SO THEY CAN BUY ME A DINNER CRUNCH.
{Cut to the shadowy figure in his lair.}
SHADOWY FIGURE: {subtitled} MMMM HMMM HMMM...
{Close-up of the shadowy figure's finger pushing a red button.}
TEXT: PUSH!
{Cut back to Stinkoman, who gets hit by a bolt of blue lightning.}
STINKOMAN: {subtitled} AAAAAHH! RED BUTTON LIGHTNING!!
{Stinkoman disappears and is transported to an icy place. Close-up on Stinkoman.}
STINKOMAN: {subtitled} WHERE IN CHORCH'S NAME AM I?!?
{Stinkoman shivers.}
STINKOMAN: {subtitled} BRRRR! IT'S COLD! I BETTER KEEP MOVING OR I ELSE I'LL FREEZE TO SQUARE!
{Cut to a zoomed out shot. Stinkoman runs off to the right as he is slowly silhouetted.}
STINKOMAN: {subtitled} MAN, WHEN I FIND WHOEVER RED BUTTONED ME, I'M GONNA CHALLENGE THE CRAP OUT OF THEM.
{Cut to the level start scene with the words "TRY LEVEL 7.1" at the bottom.}
{As the level begins, the following words are projected across the screen for a few seconds.}
START PLAY!
[edit] Stage 7.1 (Guide)
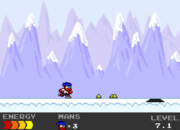
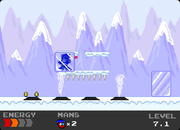
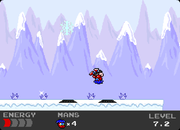
- First order of business: DON'T STAND STILL IN THIS LEVEL! If you do, Stinkoman will eventually freeze into an ice cube, costing him a unit of life. Additionally, the entire level has poor traction, making it difficult to both start and stop moving.
- Destroy or avoid the three My Benj, and make your way past the Ditmars when it stops. Destroy the ice cube (or "Biztar") in front of you by blasting it six times.
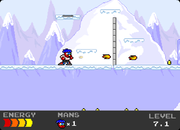
- Climb the retractable ladder when it comes down, and then destroy the Biztar. There may be a capsule below, but the upper path is easier in this case.
- If you choose to take the lower path, jump the two Seeper Mo, grab the capsule. Then destroy the Stothos and jump to the next platform and destroy the My Benj. Get past the Ditmars. Don't jump, or you will touch an Old Sage.
- Now, back to the upper path. Be prepared for the Fullbide when it flies by; destroy it so it doesn't come back. Head right and destroy the two Biztars and the My Benj behind them.
- Keep going forward on the upper path. Another Fullbide will bother you. Kill or avoid it, and destroy the next Biztar in your path. It will reveal a Seeper Mo; wait for the platform to arrive (jump in place or keep attacking air to avoid freezing) and jump over the Seeper Mo to land on it.
- From this platform, jump down to the next, watching out for the Fullbide. Jump to the next platform (and cross the checkpoint flag in New Mode), then then jump past the last Ditmars.
- Destroy the Biztar to reveal a capsule (a Fullbide may appear here), and trash the My Benj behind it. Then, destroy the Biztar over the trap door. Jump to it as the trap is coming up; here there are two paths you can take.
- Lower path: Jump to the right, destroying or avoiding the My Benj. Make your way past the Ditmars when they're inactive. At the cliff, jump to the lowest platform. This is where the paths connect.
- Upper path: Climb the ladder and destroy the Stothos. Jump on the platform to the right side of the wall, then jump off, break up the Biztar while dodging the My Benj, and (if you can) blast the little blob to bits. Then jump onto the platform, and you'll be where the paths cross.
- Jump onto the right platform, then hop on the moving platform when it's in range.
- A Stothos is waiting for you above. Either take it out, or quickly rush through it if you have energy to spare (there's a capsule beneath).
- An easy way to kill the Stothos is by jump-shooting it from the moving platform.
- Jump down to the capsule if you need it while avoiding the Seeper Mo.
- Climb the two retractable ladders and blow up the Stothos.
- Jump down to the moving platform, and then to the flag to end the level.
[edit] Stage 7.2 (Transcript)
{The same level start scene is shown with the words, "TRY LEVEL 7.2" at the bottom.}
{As the level begins, the following words are projected across the screen for a few seconds.}
START PLAY!
[edit] Stage 7.2 (Guide)
- There's a capsule behind the lowest Biztar in the "wall" to your left.
- Destroy the Biztar on the right and collect an extra life. This may come in handy when you get to the boss stage.
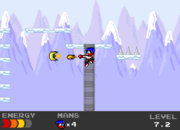
- Jump across the platforms, destroy or avoid the My Benj, and destroy the Stothos. (The My Benj is easier to kill from far, so before you jump onto the next platform, just shoot until you think the My Benj are destroyed.)
- On the next platform, watch out for the Fullbide. Avoid the Ditmars and the My Benj as you continue. Jump on the next platform. There are two paths from here, both leading to the moving platform.
- Lower path: Do not destroy the two Biztars. Instead, jump on them and keep yourself occupied until the moving platform comes down.
- Upper path: Jump up the stair-like platforms to the left and climb the ladder. At the top of the ladder, shoot the Fullbide, then jump onto the next platform to the right. Shoot the My Benj.
- Jump to the moving platform when it reaches you. You can grab the capsule on the left, but watch out for the Seeper Mo!
- Jump on the next platform, and then to the ground. Carefully jump over the Seeper Mos and past the Ditmarses. (Don't bother to stop, because your momentum will likely carry you into the next one anyway if you do, and you'll reach the Ditmarses while inactive if you keep moving.) Don't worry too much if you get hit once or twice because another capsule is coming up. In New Mode, cross the checkpoint flag.
- Jump to the moving platform and grab the capsule. Climb the retractable ladders (you can reach the first one even if it's retracted) while watching out for Fullbides. Don't destroy any Biztars!
- Climb down the Biztars. While standing on the last, try to destroy the two Biztars to the right to make your life easier.
- Jump down and a splode the Stothos. Space is limited here, so make sure your jumps count.
- If you didn't destroy those two Biztars to the right yet, do it now (though the far right one isn't necessary). Jump to the platform the Stothos was on and then to the floating platforms to the right. Climb up the platforms while dodging or destroying the Fullbides that fly from both sides.
- At the top, destroy the My Benj to the right and jump to their platform. Drop down and climb the ladder down, destroying all Fullbides on the way. Don't drop down the ladder!
- Climb low enough that you can see the moving platform. When the platform is just about to reach its leftmost position, climb to the top and quickly jump down and to the right, so that you land on the platform.
- Jump to the ground to the right to end this level.
[edit] Level 7 Boss: An Ice Machine (Transcript)
{As the round begins, An Ice Machine will fall from the sky, causing the ground to shake. Stinkoman will say his world-famous line.}
STINKOMAN: Are you asking for a challenge?
After you defeat An Ice Machine...
{An Ice Machine starts to explode as Stinkoman runs away. The screen flashes white and the boss explodes, blowing Stinkoman away.}
STINKOMAN: {subtitled} WHHAAAAAAAAAAA!!
{Stinkoman lands in a victory pose.}
STINKOMAN: {subtitled} NOW TO GET REVENGE ON WHOEVER RED BUTTONED—
{The blue lightning zaps him again and he's teleported away.}
STINKOMAN: {subtitled} CRAP.
[edit] Level 7 Boss: An Ice Machine (Guide)
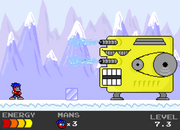
- An Ice Machine starts the battle by throwing ice cubes at you while shooting a powerful water jet at the platform in front of him. For the time being, jump the ice cubes.
- He will shoot between two and four, depending on how many times he has been hit. However, his pattern is not straightforward. (Specifically, it is 3, 3, 4, 3, 4, 2, 4.)
- When he stops shooting cubes, the jet will also stop, so the moment the retractable ladder comes down, climb up immediately and hit his eyes. You can only hit him once, so drop down to more easily avoid the icicles that are about to come your way.
- You can avoid them on the platform, but you'll have to watch them closely and jump down quickly to avoid the jets.
- Repeat the pattern from the beginning. Seven shots will do him in once and for all.
- However, if you want an advantage: When An Ice Machine drops down, his eyes are open, meaning you can hit him then. Hold S as soon as Stinkoman says his lines, and if you fire at the right time, the boss's eyes will collide with the shot. If you do this, the first 3 in the above pattern is skipped.
| Stinkoman 20X6 | |
|---|---|
| Levels | Level 1 (Go Home!), Level 2 (Pick a Bone!), Level 3 (Dumb Wall!), Level 4 (Fisticuff!), Level 5 (Oh, the Moon!), Level 6 (Stratosfear!), Level 7 (Ice 2 Meet U), Level -0 (Negatory!), Level 9 (Turbolence), Level 10 (Lastimost!) |
| Gameplay | Playable Characters, Enemies & Items, Stinkomanual, Walkthrough |
| Media | Intro Cinematic, Screens, Level 10 Launch Trailer |
| Miscellaneous | Series (Character), Source Files, Development of Level 10, Make-O Your Own Stinko, Level 1 Theme |
| Fun Facts | Trivia, Remarks, Goofs, Glitches, Inside References, Real-World References, Fast Forward |
