Stinkoman 20X6 Enemies and Items
From Homestar Runner Wiki
There are an abundance of enemies and items in the game Stinkoman 20X6.
Contents |
Enemies
| Name | Image | Description | Shots to kill | Level |
|---|---|---|---|---|
| Jaro | | Jaro is a small, jumping robot that can be destroyed in one hit. | 1 | 1,5,6,-0 |
| Greggo |  | Greggo is a robot that walks back and forth on its platform. It crouches and becomes immobile and invulnerable when you face it, but if you can hit it while facing away, one hit will take it out. One way to kill Greggo is to stand a distance away, shoot at it, and then quickly turn to face the other way while your shot travels toward it. | 1 | 1,-0 |
| Browntant | | Browntant is a stationary robot that shoots straight forward every few seconds. It takes three hits to kill. A blue variety can be found in levels 6 and -0, identical to the original Browntant in every way except color. | 3 | 1,2,5,6,-0 |
| Chorch | | Chorch is a robot that flies back and forth above ground. Don't allow it to pinch you! It takes one hit to destroy this enemy. | 1 | 1,2,5,6, -0 |
| Kolkaryu | | Kolkaryu is a small flying saucer that appears out of the sky in specific places. It hovers for a moment, shoots two downward bursts of four bullets each, then flies away. It is invulnerable to your attacks — just stand or jump out of the way, or stand directly beneath it to avoid its bullets. | inv. | 1,2,5,-0 |
| Pooru-Pooru | | Pooru-Pooru is a spiky cucumber, planted firmly in the ground, usually in groups. Touching it will cause you to take damage, so jump over it or otherwise avoid it if possible. | inv. | 1,2,3,-0 |
| Old Sage | | Old Sage is a sharp, stationary spike, usually found in groups. Touching one of these causes you to die instantly, so be extremely careful around them. (Note: While fighting Ekersby, Old Sages only cost you one unit of energy.) | inv. | 1,2,4,5,7, -0 |
| Terrell | | Terrell is just a loose chick head that bounces around, easily defeated in one shot. | 1 | 2,-0 |
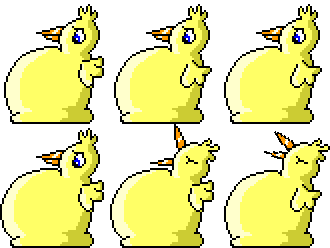
| Grundy |  | Grundy is a wingless chicken wearing running shoes. It walks back and forth on its platform, occasionally speeding up and slowing down. You can kill it in one easy shot, so it is a minor nuisance at most. | 1 | 2,-0 |
| Stobat |  | Stobat is a fat chicken with no visible feet. It blocks your path and spits out three bones every few seconds. It takes four hits to kill a Stobat, so time your shots well and step, jump or climb out of the way when it shoots its bones at you. | 4 | 2,-0 |
| Rose Blake | | Rose Blake is an electric burner. Don't step on it when it's white-hot and flashing. Learn its pattern to gain safe passage. | inv. | 2,-0 |
| Lundsford |  | Lundsford is a small flame from a gas burner. Just like Rose Blake, you should learn its pattern so that you can walk or jump over it safely. | inv. | 2,-0 |
| Tortan | | Tortan is a bottle of itself according to the Stinkomanual. It is a green liquid that drips out of bottles (of itself) and will cause damage if it drips on you. | inv. | 2 |
| Clowder |  | Clowder is an angry cloud, which had a propeller up until Version 7.1. You cannot kill it, so just avoid it. | inv. | 3 |
| Mr. Ubbers |  | Mr. Ubbers is an angry raindrop that falls from above in stage 3.1. It can't hurt you, but if you punch it, it will disappear in a splash and produce a gold nugget, which you must collect to pass the level. | 1 | 3 |
| Poorbt | | Poorbt is a small humanoid that runs in from offscreen, shoots at you, and then runs away again. In Levels 4.1 and 4.2, you can block his shots with your giant fist. | 1 | 4,-0 |
| Gokul | | Gokul is a pile of junk and red goo that blocks 1-Up's path in Levels 4.1 and 4.2. Kill it by crushing it with rocks sent down by your mighty fist. | 1 | 4,-0 |
| Gaspeau | | Gaspeau is a seeker drone that flies in only one direction. Kill it in the same way as Gokul. | 1 | 4,-0 |
| Pink Cham Cham | | Pink Cham Cham is a double-ended laser gun rolled in green coconut. It fires its lasers upwards at Stinkoman, but you can easily block them with your giant fist. Destroy it by smashing the floor above it, while keeping yourself out of the lasers' range. | 1 | 4,-0 |
| Frotzer | | Frotzer is a red version of Gaspeau that flies back and forth over a short distance. | 1 | 4,6,-0, |
| Astromund | Astromund runs toward 1-Up in Level 5. Its shield protects it from 1-Up's frontal attacks - just jump over it, kicking it from behind if you wish. (Note: In Level -0, Stinkoman can shoot Astromunds from the front.) | 1 | 5,-0 | |
| The Bendini Sisters | The Bendini Sisters are meteors that fall regularly on the moon. Dodge them and don't let them hit you. (Note: In Level -0, arrow Platforms can also crash down from above - see Other Hazards below.) | inv. | 5,-0 | |
| Downtant/Uptant | Downtants and Uptants are related to the Browntant. They only take two hits to kill, but these turrets shoot a spread of five shots at a time, making them dangerous in groups. | 2 | 5,-0 | |
| Piedmont | Piedmont is a scanner that fires deadly beams of light underneath it. You can't hurt it so dash under it while it is inactive. Touching Piedmont itself doesn't hurt you, so long as it isn't firing its beam at the time. | inv. | 5,-0 | |
| Stafulter | | Stafulter is a giant electrical plug that flies around in a fixed pattern. It is invincible and must be avoided at all costs. | inv. | 6,-0 |
| Protek |  | Protek is a giant electrical socket that jumps up and down on its cord, blocking your path. After taking two hits, its cord disappears and it sits there shooting lightning bolts at you (one from each socket), forcing you to jump over each bolt separately. It takes 3 more shots to destroy Protek. While bouncing, touching Protek's cord costs you 2 units of health, while the sockets themselves are harmless. When the cord disappears, the sockets deal 2 units of damage, and the bolts cost you 1. | 5 | 6,-0 |
| Postlethwaite |  | Postlethwaites are black storm clouds that move back and forth and strike lightning every few seconds. Get out of their way quickly! | inv. | 6,-0 |
| Porchi | Porchi is a buzzsaw that comes out of the clouds at regular intervals. It can't be harmed, so run under it or jump over it while it's retracted. | inv. | 6,-0 | |
| Hash-Haw | Hash-Haw is a saw blade that cuts back and forth along your path. Like Porchi, your best bet is to run under it or jump over it. It is easiest to avoid when it's moving toward you. | inv. | 6,-0 | |
| My Benj | My Benj slide back and forth randomly on their platforms. They can be destroyed with one hit each, but their small size makes them difficult to kill. | 1 | 7,-0 | |
| Stothos | Stothos is a small tank that moves back and forth across its platform, shooting lasers in both directions. The lasers are high enough to make avoidance difficult, so be very careful! Stothos takes three shots to kill. | 3 | 7,-0 | |
| Fullbide | Fullbide is a small ship-like enemy that flies in a zig-zag pattern toward Stinkoman when he enters its territory. It can be killed in one hit, but it will continue attacking until it's destroyed. | 1 | 7,-0 | |
| Ditmars | Ditmars will freeze Stinkoman temporarily, causing you to lose control of him and ultimately costing him a unit of energy. They cannot be destroyed. | inv. | 7 | |
| Seeper Mo | Seeper Mo is essentially the same as Pooru-Pooru: You can't kill it, it doesn't move, and touching it costs you a unit of energy. Jump over these icy spikes, but be careful not to slide into the next one when you find them in groups! | inv. | 7,-0 | |
| Biztar | Biztars are large blocks of ice that serve as platforms or obstacles. They are just obstructions. You can destroy them with six hits. | 6 | 7,-0 | |
| Unknown |  | This enemy is a cabbage-like creature that periodically opens up and shoots out two red balls. Only the left ball can hurt you - the other one is harmless. You can destroy it with one hit only while it is open. (Note: While this creature has only appeared in Level -0, it has been in the object library since the first version of the game. It is not covered in the Stinkomanual.) | 1 | -0 |
| Prudench | | A Prudench is a flying shrimp that usually attacks in groups. Kill it with one hit. | 1 | 9 |
| Dolmerlay | | A Dolmerlay is a robot oyster that shoots three pearls at a time. Wait until it's open to shoot it. | 1 | 9 |
| Roldhap | | Roldhaps are cyborg anemones that shoot at you. Except for their appearance, they are identical to Uptants and Downtants. | 2 | 9 |
| Semulade | | A Semulade is a mechanical shark that attempts to sneak up from the edge of the screen and then charge at you. It takes two hits to kill. | 2 | 9 |
| Fundlake |  | A Fundlake is a coral that blocks your path. It disappears with just one shot, but it reappears quickly, so be careful! | 1 | 9 |
| Sackastano | | Sackastanos are robot goldfish that travel in schools like Prudenches. They take three hits to kill, but are only invincible very briefly between hits. They have only appeared once in level 9. | 3 | 9 |
| Quorvekt |  | Quorvekts are robot manta rays that stay in front of you and move vertically to shoot at you. They take three hits each to kill. | 3 | 9 |
| Broodacre |  | A Broodacre is a small volcano that shoots two rocks at a time. Learn to predict its eruption patterns. | inv. | 9 |
| Reid | | Reids are cyborg jellyfish that fly in schools. Shoot them twice to kill them. | 2 | 9 |
| Unknown |  | This robot octopus enemy flies in circular patterns, usually as part of a group, and it takes three hits to kill. It is not covered in the Stinkomanual. | 3 | 9 |
Other Hazards
These are hazards which are in the game but not named in the manual, so the names here aren't official.
Items
Bosses
| Name | Image | Description | Shots to kill | Level |
|---|---|---|---|---|
| Tampo | 
| Tampo's brain comes back to challenge you at the end of Level 1 for revenge. Its weak point is its cerebellum (the red ball at the base of the brain). Wait for Tampo to move down to the ground, then jump up and shoot the cerebellum. When it shoots from the ground, just stand in place to avoid its mind shots. Move all the way to the far edge of the screen and jump over its mind shots when it fires from the air. Tampo takes 7 hits to kill. The more hits it takes, the faster it gets, so be careful.
For more information, see the Level 1 Walkthrough. | 7 | 1 |
| Brody |  
| Brody is a giant chicken who tries to stomp you with his feet 6 times, then pecks at you with his beak. Just shoot Brody's eye when it appears. Brody takes 5 hits to kill.
For more information, see the Level 2 Walkthrough. | 5 | 2 |
| Stlunko | 
| Stlunko is the robot hidden underneath the wall that Stinkoman jumps over in Level 3. It has a large conveyor belt that periodically switches directions, and it attempts to crush you with its giant fists. To defeat Stlunko, shoot the wall on its head until all four sections have been destroyed - 16 hits in all.
For more information, see the Level 3 Walkthrough. | 16 | 3 |
| Saargtsson & Firey-Hot |  | Saargtsson is a dragon-like boss that jumps up from the lava and shoots lasers at you, while its flame jet friend (Firey-Hot) shoots at you at random places from the roof. Only the end of its tail is vulnerable. Each segment takes two hits, and the head takes 3 hits, for a total of 15. Firey-Hot is invulnerable.
For more information, see the Level 4 Walkthrough. | 15 | 4 |
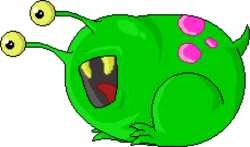
| Nebulon | Nebulon is a large green space alien that shoots energy bullets out of his mouth in random directions. Each time you damage him, he blows you backwards and starts shooting bullets out the number of times you have attacked him, plus one additional energy bullet. To beat him, you need to hit his eyes 4 times each. In total, he takes 8 hits to destroy.
For more information, see the Level 5 Walkthrough. | 8 | 5 | |
| The Liekand | The Liekand is a giant tornado with sunglasses that shoots out 3 bubbles and then jumps across the screen. Each time it shoots bubbles (except for the first time), it also tries to suck you in. Every third time it jumps across the screen, it stops in the center and causes lightning bolts to fall. When you get The Liekand down to 4 shots, he will start shooting 5 bubbles at you. Its sunglasses are its weak spot. He takes 14 hits to kill.
For more information, see the Level 6 Walkthrough. | 14 | 6 | |
| An Ice Machine | An Ice Machine is, as its name suggests, a giant ice machine. It shoots ice cubes at you while shooting ice jets at the platform in front of it. After shooting several ice cubes, it turns off its jets and starts shooting ice into the air, causing icicles to fall from the sky. Shoot it 7 times in the eyes while it's shooting icicles to defeat it.
For more information, see the Level 7 Walkthrough. | 7 | 7 | |
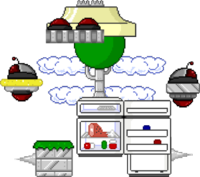
| Ekersby | Ekersby is a robot formed from a pile of glitchy junk. It staggers back and forth, shooting bullets from its Uptants and Downtants and spearing the top platform with the two Sporks on its head. To damage it, you must hit the refrigerator at its stomach while it's open, and each time you damage it, the door opens from the opposite side of the glitch robot. You cannot kill the turrets, so carefully avoid their shots. The Browntants are just for decoration, so they don't shoot. Ekersby takes 6 shots to kill.
For more information, see the Level -0 Walkthrough. | 6 | -0 | |
| Harvax XVII | Harvax XVII is a giant hovering gangster robot that shoots bullets at you with a tommy gun. Every third round of bullets, he charges at you. You must dodge his shots and get out of the way (using shields if necessary) when he charges. Shoot him in the mouth 15 times while it is open to defeat him.
According to the Stinkomanual, Harvax XVII is a small but speedy octopus or squid, though Harvax himself claims in his quote: "That description is ALL WRONG!" For more information, see the Level 9 Walkthrough. | 15 | 9 |


